Tuesday, July 31, 2012

Genetic Risk Factors for Hoarding

1

2

3

Bear with me if this doesn't look right. Switching to Linux has me wrestling with a new suite of tools. Gimp for image editing is still a stretch for me. (Really, I just want to crop and rotate--does that need to be so complicated?) And losing Windows Live Writer for layout is more of a drag than I expected.

Ah, the sacrifices we make for our typecasting!

Wednesday, July 25, 2012

Linux Mint 13 Saves the Day

I'm back running Linux on my PC again, after 18 months with Windows 7.

This time I decided to go with Linux Mint, since I don't really like the look and feel of the new Ubuntu, and reports indicated Mint would work well on my older hardware.

Why the switch back? Well, last night I got a nasty notice informing me that "This copy of Windows is not Genuine" It popped up when I started the computer and stayed in the corner of my screen like a piece of digital graffiti. And there was a link I could click that would make this go away so long as I forked over a credit card number.

I really have no idea whether the copy is genuine or not, since I bought the PC third hand. But I wondered, if it's not, why did it take them so long to catch on? And what is Microsoft doing, reaching into my home and under the hood of my computer, monkeying around without my permission?

I really didn't feel like calling them up and arguing the point, so I did a bit of googling and ran some awkward utility that did who knows what-all and locked up my system, but when I restarted it, the message was gone.

Still, I was shaken. The proprietary beast had reared its ugly head in again, reminding me that my computer wasn't really mine. All the tools I've started to rely on could be snatched away if I didn't provide a flow of bullshit and revenue on a predictable schedule. And I shouldn't have to turn to buggy, untrusted utilities just to keep using my computer, wondering if they've installed some back-door or trojan in the process.

So I downloaded the new Linux Mint ISO, burned the DVD, and ran it in trial mode for just long enough to discover it's bloody fantastic.

Some of the more pleasant surprises from this release:
  • The MATE desktop saved the best and simplest aspects of the Gnome desktop, which has been discontinued in pursuit of Unity's flashy tablet-style interface.
  • The selection of pre-installed utilities is perfect. Every time I went to install something I thought I needed, I discovered it was already there. At the same time, it didn't come with much that I won't use. Other than instant messaging and IRC chatting, I'll probably use just about every application on here.
  • The default music management program, Banshee, can manage my iPod! It does a much better job of it than the third party application I was using in Windows. Not to mention it's much simpler than iTunes, and doesn't advertise to me every time I just want to play some music.
  • The disc-burning tool, Brasero, provides the most intuitive method for burning CDs and DVDs that I've ever encountered.
  • It installed in just 15 minutes and runs great on my old Pentium-4 computer. So I decided to put it on my antique netbook, which is the original Eee701. That little netbook has no optical drive, so I had to put the ISO installation file on a USB stick. This took all of ten minutes with Imagewriter, another utility that was installed by default.
What am I going to miss about Windows? (And why had I been using it for 18 months?) Evernote, I guess. That had been the Killer App for me, even though it nagged me about updates and begged for money. (Sorry, but I'm not about to subscribe to software.) Solution: Tomboy Notes seems to handle the Evernote workload pretty well, minus images, and I still have access to my old work through the web-interface. (Which in itself is rather creepy.)

My guilty pleasures of Minecraft and Second Life will take some fiddling, but I think I can make them work in Linux eventually.

My old student copy of Photoshop from 1998 fit me like a well-worn glove. Figuring out the Gimp for image manipulation is going to be a pain in the ass. I understand it's a powerful program, but I just can't wrap my head around that interface.  Can anyone suggest a decent online tutorial for it?

Then there's the scanning for viruses and malware and all the rest...

Oh wait, I'm not going to miss that at all.

Tuesday, July 24, 2012

Piano Guys' Unconventional Use of Instruments

Thanks to the Flip the Media blog for pointing me to these guys.


There's something especially satisfying in using an instrument in a way other than it's intended, so long as it comes out sounding like more than a gimmick. I think these guys are the real deal.

It reminded me of this interpretation of Mussorgsky's "Pictures at an Exhibition" played on guitar. All the different sounds Jorge Caballero gets out of one guitar are difficult to believe. That piece was written for an orchestra, after all.


This performance by Kazuhito Yamashita from the 80s is just as impressive. (I wonder if we could get him in front of an HD digital camera to do it again?)


Good grief, I'm about to lose a whole afternoon to watching classical music performances again, aren't I?

Wednesday, July 18, 2012

How To Make Grocery Bags Into Typing Paper

One does not simply do something as neurotic and repetitive as converting paper bags into typing paper without developing a few techniques and best practices. As there seems to be some interest from the typosphere in trying out this practice, I thought that I might share a few.

Usually, one of The Wife’s grocery trips will provide more than enough paper to keep me typing for the week. In fact, I have yet to run out of grocery bag paper since she has started saving these bags for me. If I could keep up with her grocery runs, I’d probably have a trilogy completed by the end of the year. In any case, it frees me up to ramble on to no end when I know that at least, the paper was free.

So, to begin:
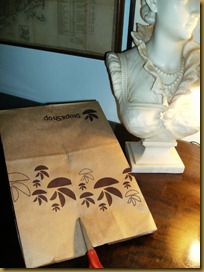
SeamCut

It’s best to make your first cut along the seam, where the two layers of paper are glued together. When I started, I would cut along the corner. But this meant that, when the paper was all laid out, the bulky seam would be stuck in the middle. Typewriters don’t like passing that doubled up layer under their platens.
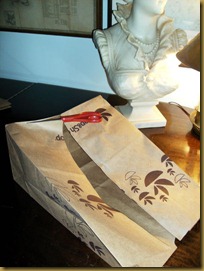


BottomCutWhen you get to the bottom, cut around to remove it. It’s easiest if you cut about 1/4” away from the crease. This keeps your scissors from getting caught up in all the layers and glue down there.


SeamRemoveOnce you’re done with this, you’ll be able to spread out the bag in one giant sheet. Now you can slice off that seam and get rid of it.
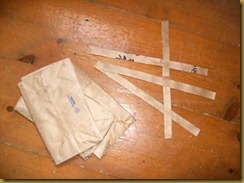


WasteThere is very little waste involved in this process, but I’m wracking my brains to come up with a use for the discarded bottoms and seams. Maybe grocery bag bottoms could supplant the Dollar as a new currency, in the thriftier times that may be coming? Perhaps I’ll line my mattress with them…
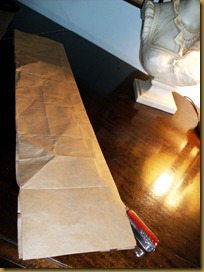
 

LongCut

Back to the sheet. Fold it in half the long way. Surprise! It’s approximately 8 1/2” wide! At this point, you can use a knife to slit along this length and get two long strips. Paper this size has its uses. It makes for uninterrupted typing—you could even tape a bunch of them together for a Kerouac type scroll or BAROP. It’s also pretty dramatic to start feeding one of these through your machine in a public place.

I tired of these vanity sized strips, however, when it came time to store and file my writing. Long strips don’t fit in a file cabinet too easily, and there’s really nothing useful you can do to them with a three-hole punch. Sure, you can fold and stack the strips, but then unfolding it anytime you want to revise or reference something you wrote last week gets to be a drag pretty quick.
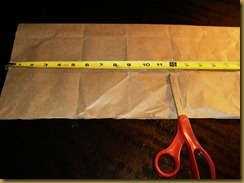
SizeCutInstead, I cut through the folded-over bag along the seams, located one third and two thirds along its length. This will make three 12” sections with no more waste.  That’s close enough to normal for me, but someone with a proper paper cutter could trim off the extra inch later on if they were so inclined. They would probably also use a lot more care in executing straight cuts throughout this process, while I am embracing the absurd rusticity of the whole deal.
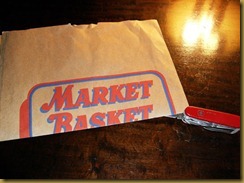
TripleCut

Take the three folded-over sections into a single stack and then slit the fold with a knife. Careful not to cut yourself!

Now you’ll have six sheets at 8 1/2” by 12”.
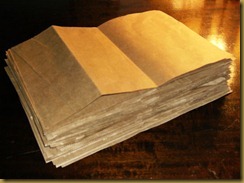


PaperPile

Huzzah! A proper stack of durable, heavy paper.

It’s not lying quite flat enough, though.


BookPress

A day or two under a stack of books helps take out the creases and compress the paper into something a little more manageable.
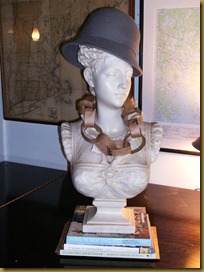


StatuePress

For a little extra weight, enlist the help of  a friend.

Oh hey, I found a use for those discarded strips!
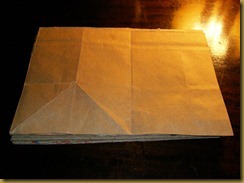


ReadyAll flattened out and ready for a typecast.

Very nice!


* * *
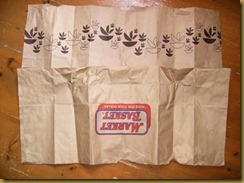
MarketAdvantageOne final observation: you can see here the clear advantage of Market Basket over Stop and Shop grocery bags. Stop and Shop has chosen to spread their marketing around the whole circumference of their bags. This is their prerogative, of course, but it means you’ll only be able to use one side of their paper. (That leaf pattern really is too dark to type legibly across, even with a fresh ribbon.)

The Market Basket bag, on the other hand, will provide a sheet that is blank on both sides four out of six times. This strikes me as a very generous design decision on their part. One of the great joys of paper bag typing is that it’s tough enough to use both sides with no punch-through.

I’m toying with the idea of making journals out of this stuff, since it works phenomenally well with fountain pens as well. Moleskine should have started using this years ago. Their journals bleed fountain pen ink something terrible.

In anticipation of this project, I’ve taken to sorting the logo-free sheets from the printed ones. I’ll type on the blank side of the printed ones and fold the virgin pages into a nice journal.

Which probably brings me to a whole new level of crazy.

Monday, July 16, 2012

More Afternoons Should Be Spent This Way

Ipod – check. Dog – check. Comfy outdoor sofa – check. Laptop – kind of check. Shoes – conveniently missing.

IMG_4460

Not the most flattering photo in the album. (Why is it that headphones look cute on girls but on me they just accentuate how freakishly wide my head is?) But hey – this picture’s not about me. It’s about the afternoon.

Which was lovely.

Saturday, July 7, 2012

First Honda Accord Repair: Heater Switch

I completed my first repair on the Honda today. Although I suspect it may be--as most of the repairs may be, here at the bottom of the learning curve--a rather temporary thing. But that's okay!

I reached into the machine, and I made things better. Also, nothing broke.

A few days after we bought the car, I discovered that the heat control knob spins rather uselessly in the dash, apparently connected to nothing. This is no problem for the summer. I hadn't really expected air-conditioning to work in a 17 year old car, and we've got a few months to go before I have to start worrying about the cold again. But this just felt like the right sized challenge for ignorant and eager little me.

The Haynes manual instructed that the knob could be removed by gently prying at it with a small screwdriver. Well, actually this one lifted out with no effort at all! The back of the knob, which was meant to fit around a post and grip it firmly, was cracked and broken--half of it was missing. Faithless plastic! The post, however, was metal. I tried turning it with pliers to see if that would adjust the heat.

But it wouldn’t turn. At least, not more than a hair, before springing back. Also, it was clear from the deformation and scoring on this post that I was not the first one to attempt to turn it with pliers. Rather than force it, I returned to my Haynes manual. It had instructions for disassembling the dashboard and getting at the cables, but nothing about this particular problem. So I went to YouTube.

Aha! A video where the heating control valve and cable are described! I rushed underneath the hood of my car to lubricate the valve, stymied for several minutes by the awkwardness of navigating a bottle of three-in-one oil around my air intake to the base of my firewall. Once I got that all greased up, I reached down to open and close it manually. It moved, but stiffly. I thought, worse comes to worst, I can always turn the heat on from out here. And with this much resistance, a replacement knob would just crack under the strain. I was thinking I might need to replace the heater valve, which would mean moving a bunch of these other hoses and tubes out of the way and then hoping I could get them all back together again.

Then I thought, maybe it's not the valve that's stuck at all. Disconnecting the cable was easy, just a matter of lifting it off a post. And indeed, the valve opened and closed easily now.  It was the cable binding up, somewhere along its route. I had visions of disassembling the dashboard to trace it out, looking for signs of kinks and chafing. But as I worried it back and forth, things seemed to loosen up somewhat. The wife sat in the car and confirmed that the dial was moving at the other end. Just moving the cable back and forth for a few minutes seemed to make a world of difference.

I’ve ordered a replacement dial, but in the mean-time I’ve discovered I can take the identical dial off the fan selector switch and place it on the heater post. It works! The control doesn’t seem to be accurately calibrated, but I do have a decent range of hot to cold air to choose from until I want to pull off that dashboard someday and see what’s really going on in there.